Introduction
I have tried to compile a FAQ page about image file types and digital
imaginary in general. If you have any questions that I've not covered
here, please feel free to email me directly.
David - UK
Click on a Question/Topic to find out more:
-
What does the "bit" of a colour mean and what is True Colour, etc?
-
What are the commonly used graphics file types?
-
What are the differences and advantages of these various file types?
-
What does DPI mean?
-
DPI and Scanners
-
Digital Cameras and Resolution
-
How does JPEG compression work?
- Some Guidelines for editing images
Answers to Questions
What does the "bit" of a colour mean and what is True Colour, etc? (Answer from David - UK)
The number of bits refers to how much data is used to store the
information contained in any given image. Lets consider the difference between "8 bit"
and "24 bit" colour storage schemes:
Computers work with binary numbers (a series of 1s and 0s), so naturally
the representation of the colour of any particular pixel is in binary
notation, (and so is the black & white or "gray scale" information). All colours
can be broken down into amounts or percentages of Red, Green and Blue or RGB (Your home
colour TV uses this same principle).
As an example, in a simple scheme which uses only "3 bits" of data to
represent RGB (with a 1 meaning that colour was present), you would be
able to define a simple set of colours eg
[000] would be Black,
[100] would be Red,
[010] would be Green
[101] Red + Blue = Purple.
From this example you can see that the colours you that you would be able
to represent using this type of system, would be very limited. In fact,
the maximum number of colours that you could represent by this limited
amount of data would be only 8. It would not allow for anything even
close to photographic quality. But, the more "bits" you add, the more colours
you can define.
For example:
4 bit = 16 colours
8 bit = 256 colours
16 bit = 65,536 colours
24 bit = 16,777,216 colours
32 bit = 4,294,967,296 colours
There is a trade off however, the more bits you use, the higher quality
of the image, but also the more memory the image will end up using. Most
graphics files use 24 bits, and some computers are capable of 32 bits, but
most graphics files (unless they are for a special purpose) use just the
24 bit numbers, since this is normally sufficient colour definition and
it usually ends up as a reasonable file size. Some newer scanners scan
at 42 bits, to get higher quality, and then reduce this 43 bit
information back down to 24 bits, giving somewhat better end quality than
24-bit-only scanners are capable of giving.
You may have noticed on your computer, when you go to the Display
Properties and select the Settings tab, the "Colours" box will probably
refer to "High Colour" and "True Colour". This refers to the number of
bits being used, and the exact meanings will depend on the age of the computer
and what graphics card is in use (some will define True Colour as 24 bit
and others as 32 bit).
Back to Question List
What are the commonly used graphics files? (Answer from David - UK)
BMP (Bitmap)
TIFF (Tagged Image File Format)
JPEG (Joint Picture Experts Group)
GIF (Graphics Interchange Format)
PNG (Portable Network Graphics)
Back to Question List
What are the differences between the various file types?
BMP (Bitmap)
This file type can store from monochrome to true colour (32 bit or 24 bit
depending on your system). It does not use any compression so there is no
loss of quality, but this also means that file sizes can be very large.
They are good for keeping high quality pictures, and, for example, scanning a
picture for printing. As these files are so large, and without
compression they are not suitable for web use, since they take far too long to
download. Also e-mailing people a BMP is not a good idea, if you want them to speak
to you again after it takes them an hour to download their mail!
TIFF (Tagged Image File Format)
These can also be used for monochrome to true colour pictures. There are
various compression scheme options, to give varying levels of compression
for different data types. The compression can be loss less i.e., no
reduction in quality. The other advantage is they are a universal standard across
platforms. (E.g. between PC/Mac/Acorn)
JPEG (Joint Picture Experts Group)
This format is designed for digital photographs and images that have
a good variation in colour. The JPEG format is best suited for digital
photographs and other natural-looking images. It is not as good for
precise artwork such as line-art. This is because some "averaging"
takes place during compression, and edges may be blurred. In most
photographs, this is not too noticeable because such sharp edges
are rare. It uses a lossy compression method to achieve compression
ratios of up to 100 to 1. This results in far smaller file sizes than 10
to 1, which may be the best most that other compression methods might
deliver. This format supports greyscale and True Colour data types;
because it uses a lossy compression method, indexed and black and
white data types do not reproduce well and are not supported. An
interesting feature of this filetype is that you can vary the degree of
compression so that you can decide what level of data retention vs.
space savings is best for your particular needs. Remember, however,
the more compression used, the less colour detail will be reproduced
in the final picture ... some detail is lost and lost detail can not be
later on recovered.
GIF (Graphics Interchange Format)
This format was mainly introduced for web graphics it uses a loss-less
compression technique. The main disadvantage of GIFs is they can only
store 256 colours, and this means that you do not have sufficient data
information to display a photograph properly. However this is enough
information for navigation icons on web pages and annoying adverts.
GIF is currently being replaced by PNG, which is a superior file type,
as can be seen below.
PNG (Portable Network Graphics)
This format is becoming the new web standard graphic file-type. The big
advantage over GIF is it can represent true colour (24 bit) which means
it can be used for photographic images. It also has a good feature for web
pages wherein you can see the graphic in varying levels of detail as it
downloads, this can let you decide if you want to keep downloading large
images. It is also good for general use as it can store 24 bit colour and
uses a loss-less compression technique. It is not good at compressing
greyscale images due to the way it stores the data, a JPEG or a TIFF with
a compression scheme is much better for storing these.
Summary:
JPEGs give the best compression for photographic images with some losses;
TIFFs and BMPs are good for storing files whilst editing them or for high
quality for printing of them. GIFs are not suitable for photographic
images and PNGs are good for web pages, with small images, however they do not
achieve as great a compression factor as JPEGs.
Back to Question List
What does DPI mean? (Answer David - UK)
DPI stand for "Dots per Inch". A similar term, that's sometimes used is
PPI or "Pixels per Inch". What this defines is the number of dots(Pixels)
per inch in any image. You will probably come across this term when
scanning/printing images. E.g. 100dpi means one pixel is 1/100 of an
inch square, 600dpi 1/600 of an inch square etc
Back to Question List
We're now going to look at the implications of dpi ... first with
scanners and then with digital cameras.
What resolution should I scan at?
This depends on what you are doing. If you are scanning a picture to
display only on the screen of your monitor then the next paragraph applies.
The monitor that you use with your computer can display 96 dpi (72 dpi on
older monitors). If your screen area is 800 x 600 (Pixels), at 96 dpi,
then that's the maximum your monitor can display (800 x 600 at 96 dpi).
Now, let's say that you have a 6" wide x 4" high picture you would like
to use as your desktop on your 800 x 600 screen. 6 divided by 4 is 1.5,
so the aspect ratio of your picture 1.5 to1. The aspect ratio of you
monitor is 800 divided by 600 or 1.333 or 1.333 to 1. The resolution you
will need to scan this picture at would be 600 (Pixels) divided by 4
(inches) or 150 dpi. See the relationship? But since the aspect ratio
(width to height) of your monitor screen (1.333:1) is not identical to
the photo's aspect ratio (1.5:1), you will have to crop the final image a
little to get it down to 800 x 600. For example, you may want to scan at
300 dpi, so that you can crop a specific part of the image to best fit
your desktop without losing detail.
If you are scanning a picture to copy it or to print it, then you will
need to consider the following information.
The first thing to look at is the resolution of your particular printer.
Some common printer resolutions now are 720dpi, 1440dpi and even 2880dpi.
(Consult your manual or printer options on the computer).
Also look at the optical resolution of your scanner.
Having done that, you now need to ask yourself what you specifically
want to do. For example, do you want to print at the same size,
e.g., scan a 6" x 4" photo and then print it out at 6" x 4"? Or maybe
you want to scan a 6" x 4" photo and print an enlargement on 8-1/2" x 11"
paper (standard U.S. size).
Some Examples:
Some Scanning software will allow you to do all of this automatically,
and it (the software) will chose the best resolution for your scanner
and your printer in the size specified.
Example Scanner and Printer Specs:
Printer can go up to 2400 x 1200 dpi
Scanner can manage 600 x 1200 dpi (Directly)
So if you scanned it at full resolution (600 x 1200dpi), and then printed
it at the same dpi (600 x 1200) you would end up with an image exactly the
same size as the original. You should be able to set this up in the
printer and scanner options menus. The results should be very acceptable at this
resolution. The raw files will be quite large (about 160MB I think),
however I also think it is worth it to get the end quality. When you have
finished printing you can reduce the size down in an image-editing program, and
then save the image as a JPEG, to compress the file down to a more
reasonable size.
If you wanted to enlarge the image from the original size, this would
reduce the resolution. For example if you had an image 4" x 4" and scanned it at
800dpi and then wanted to print an image at twice the size of the
original (8" x 8") then you would effectively reduce the dpi to 400 when you
printed the image out on paper. Keep in mind that a larger image can
always be scaled down with little to no loss of detail, but a smaller image,
while it can be scaled upward, will lose fine detail and may even tend to look
"pixelated" at some point. There is really no way around this.
From slides, you will need to go for as many dpi as possible. Here is an
example. Suppose you scan a slide (just guessing the sizes) that is
1" x 2/3" at 600dpi x 1200dpi. When you make this image 6" x 4" for
purposes of printing it, the dpi goes down to 100 x 200dpi, since you've
scaled it up so much.
Printing resolutions:
It is always best to try and keep your images at an integer (whole
number) multiple of the resolution, e.g., for a 1440dpi Printer: you can print at
1440dpi or 720dpi or 360dpi +180dpi for text only)
1440dpi factor 1
720 dpi factor 2
360 dpi factor 3
This helps the printing since it can fit an equal number of pixels to a
print dot.
Here's a little exercise you can try. If you are printing an enlargement
of a 6" x 4" original, at 9" x 6", and at 720dpi, what resolution would you
need to set the scanner at to scan that picture?
A little math is required, but it's not difficult:
Scale Factor of Enlargement = (9/6) = 1.5
We want to aim for the final image at 720dpi, so the dpi to scan at would
be:
(The DPI you want) x (Scale Factor)
In this case 720 x 1.5 =1080dpi.
This means that when printed at 9" x 6", the image will be at the same
resolution as the printer, and that should help the quality.
Summary of Printing Resolutions:
Below 200 dpi Good for text and simple line art graphics
Above 200 dpi Reasonable quality, but up close you will be able to see the pixels.
300 dpi - 600 dpi Fairly good photo realistic pictures.
You will be able to see the printing dots if you look closely.
Around 700 dpi Dots are becoming harder to see.
Above 1440 dpi Printing dots barely visible to the naked eye.
Back to Question List
Digital Cameras and Resolution.
When you buy a digital camera, there are various resolutions available
and the number of Mega Pixels is usually quoted. Here is a guide to
resolutions and what your camera will be capable of:
Around 0.3 Mega Pixels 640 x 480
Around 1.3 Mega Pixel 1280 x 960 (SHQ, HQ) 640 x 480
Around 2.1 Mega Pixel Max size 1600 x 1200
Around 3.3 Mega Pixel Max Size 2048 x 1536
Above this the maximum size goes up as well as the price!
For a more detailed look at the range of camera specs have a look at this
timeline of various digital cameras at:
dpreview.com (Use the back button on your browser to get back to this site)
Looking at this, it is apparent that the more Mega Pixels the camera
has, the larger you can make an image while maintaining good
quality for any future prints that you might make However, the
amount of memory used is also much greater, so you will also use
up much more storage space within your camera for each picture.
The price is also proportional to the maximum resolution, though
even the higher Mega Pixel cameras are gradually coming down
with improved technology and more competition in the digital
camera field.
So what are the implications ... and what resolution camera do you need?
As with scanning, it depends upon what your use is going to be. If you
just want to have images for a web page or to store on the computer
a 0.3 Mega Pixel camera would be sufficient, since in the 800 x 600
screenmode, 640 x 480 is not bad for viewing, however you couldn't really make
a high quality 800 x 600 desktop background at this resolution. It's
also not really suitable for printing high quality images. If you want to
print the pictures from such a camera at around 6 inches wide, you will only
be able to manage a dpi of 640 divided by 6 or 106dpi This is not very
good quality at all, and the printing dots will be very visible.
As you can see, as you go up in pixel count, the flexibility of your
camera will increase as well, since you can now produce images for the monitor
screen and also begin to produce good quality print outs. Above
2 Mega Pixel, where the resolution is around 1600 x 1200, you can see
that a 6" wide image allow you to realize a dpi of 1600 times 6 or
266dpi, which is quite acceptable for printing.
Obviously when choosing a digital camera there are many factors to
consider, such as the magnification factor of the zoom, the size and
weight of the camera itself, the type and size of the storage medium,
how easy the buttons are to reach, how intuitive the camera controls
are to operate, etc. But as we've seen, it is very important to consider
the resolution seriously too, since this will limit you in what you can
ultimately achieve (quality-wise) with your camera for its entire useful
life. That's why it's so difficult to answer the question "What's the
best camera for me?" Many, many factors need to be considered, not
the least of which was the subject of this treatment ... resolution.
Back to Question List
How does JPEG compression work? (Answer Dave - IL)
JPEG compression simplified -
Here's a very brief explanation of the idea behind JPEG (pronounced
jay-peg) compression.
The pictures we take with our digital cameras are composed of hundreds of
thousands of tiny picture elements called pixels, and cameras today can
go up to several Mega (million) pixels.
When the information from a picture we've taken (both black & white and
color information) is stored as numerical data on our computers, it can
take up very large amounts of memory (as you might guess). Various schemes
have been devised to lower the amount of memory needed to store a digital
picture, and one of those schemes is called JPEG (Joint Photographic
Experts Group). There are a number of "qualities" within the JPEG format, the
higher the quality, the more memory that's needed. That's because JPEG works on
a data compression principle.
Here's a brief look at it in very simplified terms. Suppose you take a
photo outdoors of a scene, and perhaps half to a third of the photo is blue
sky. One way that you could store that photo onto a disk or memory card would
be to define each pixel as to both intensity (the ratio of light to dark)
and color hue, but that's wasteful. If a lot of pixels right next to each
other are all sky-blue, why not just earmark which pixels have the same values
and store that as one number? The same type of logic is true for other
elements of the picture. And that's what the JPEG formula does, it greatly reduces
the data needed to define a picture by consolidating the numerical data
of like elements, and then of course keeping that data straight so that the
picture can be reconstructed later on.
That's why all JPEG files are different sizes, pictures with a lot of
detail and different color and intensity information will take up more memory
than simpler pictures with less detail and change in color and intensity
values.
It's a little oversimplified, but that's the basic idea.
Here's an example:
Test 1 - Normal Photo (12.8k)
Test 2 - A simple graduated fill (2.8kB)

The second file is Over 4.5 Times Smaller!
The reason the file size is different is the arrangement of the pixels the second one is very predictable with few colours, whereas as the first is a picture it is more complex. The size does not depend on what colours but the arrangement and variation in colours.
Now, again, within the JPEG family there are a number of compression
schemes, some use less memory than others. The higher the quality, the
more
samples are stored, and the more memory that's used. So high quality JPEG
compression is more memory intensive than lower quality JPEG compression.
Makes sense. But, lower quality JPEG compression also means more tendency
to see "pixelization" and other digital artifacts in the end photo. The
reason is that less sampling is done, so fine color and intensity changes aren't
recorded as accurately. Thus, many times "blocks" of pixels will be seen
where a smoother transition (color and intensity wise) would make for a
better looking end picture.
The bottom line, simply put, is that the more pixels your camera has to
use, AND the better JPEG quality that it chooses to store the image with, the
smoother the color and intensity gradient will be in the final picture,
especially on very intricately graduated flat surfaces, like interior
walls and the sky. If you can see a lot of pixilization and "blocks" of pixels,
it usually means that you'll need to consider a better JPEG compression
formula, one of higher quality.
Does this help to understand why pixels and "blocks" are sometimes seen
in digital photos? There's a lot of background that needs to understood
before you can really tear into this subject, but I've tried to minimize it as
best I can to just the essentials. Dave - IL
Back to Question List
Some Guidelines for editing images (Created by David - UK)
Basic Rules for successful editing:
-
Always make a copy of the file you are working on, then if you do
something that you did not like, you don't like you can always go
back to the unaltered original.
-
If the original file is a JPEG, when you make your editing copy, save
it as at BMP or TIFF, since these files don't use any compression. Otherwise
during editing, the losses from the compression will accumulate as the
file is saved and reopened and image quality will surely be compromised.
When you have finished editing, save only once as a JPEG and this will
make any errors virtually unnoticeable. If you feel you might ever have
to edit the image in the future, keep the "editing master" BMP/TIFF file,
otherwise you will introduce some compression error if you have to
recreate another BMP/TIFF file as a new "editing master".
Before editing:
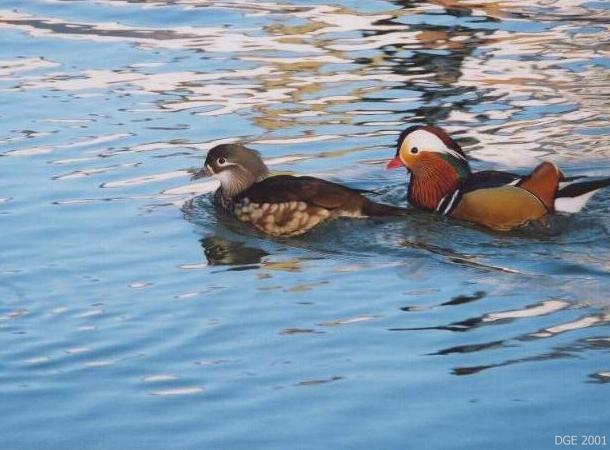
After Editing:
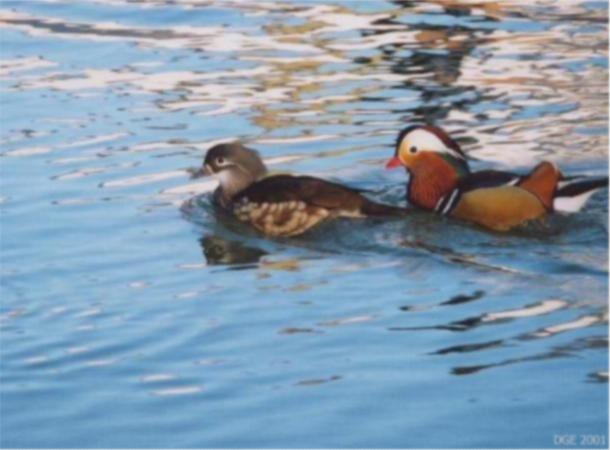
To illustrate the point here the errors are exaggerated but you can see the obvious reduction in quality (The editing I did was to rotate 45 degrees 8 times saving after each rotation, if this had been down with a BMP copy with one final save as a JPEG there would be no quality reduction)
-
When resizing, always resize in one operation from the original,
e.g. let's say you want to make copies of a 1600 x 1200 image at
both 800 x 600 (50%) and also at 640 x 480 (40%). You could resize
by 50%, save the file under a different name, then resize from the
800 x 600 image to 640 x 480 and save again. But this method is
likely to reduce the quality, since you reduced the size, saved the
image as a compressed JPEG, then reduced the size of that image
(from a JPEG, which will have some compression errors), thus
magnifying those errors.
The better method is to resize the original at the first size and save. Then from the original once again, apply the second transformation of size, and save this image. This will eliminate any compression errors and provide you with the best possible image in both sizes. Remember that when resizing pictures, it is inevitable that you will lose some quality, since you have reduced the information contained in the original file. It's somewhat like trying to write 2 pages of information on one side of a piece of paper. Something has to give.
Here's yet another example: suppose that you reduce an image in size by 50%, save it, then realize that you need to have it back at the original size, so you scale it up by a factor of 2. The original information that made up the larger size has already been lost, so the image software can only "guess" at what additional pixels are needed by interpolating the data that is left. This will mean a very blocky low quality image will be created. And that brings us back to the importance of working on a copy of the original image, not on the original itself. Another thing to avoid would be scaling up a file, saving it in JPEG format, then scaling down that saved file again. That will also generate large reductions in end quality.
-
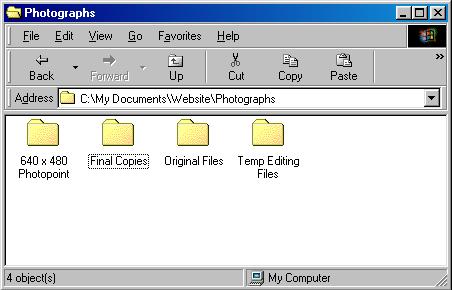
Filing System Logic: When working on files, it's a wise idea to have
good structure for your working directories. As a suggestion, you
might have a folder with all of your originals in it (just originals and
nothing else). Then another folder would contain the files you are
in the process of editing. A third folder would contain your final
versions for posting or e-mailing. These would be the scaled down
picture files to be sent to PhotoPoint for posting on the forum, or
smaller sized photos that you would use to let friends see your work
via e-mail.
Also try and organize your work so that in 6 months time, when you come back to work on some filed image, it's easier to find what you want without having to use "cryptic" filenames (I know, I know I used to do it on my other computer, but now when I try to find things on it, it can be very difficult). It is always a good idea to have a clear and logical filing system to work with.
-
For those of you with a camera that uses CD-Rs, you have an almost
permanent copy that cannot be destroyed (assuming you store the CDs
properly). For more information about long term storage, see this
Archived Tip
- See the Links Page for some useful image editing resources